Ribeye On the Menu

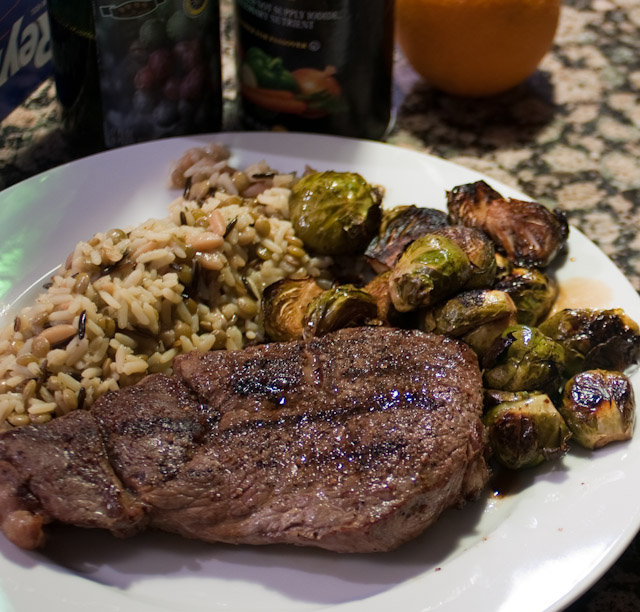
Tasked with going to the grocery store without a plan, I tend to resort to simple meals. Here’s an old favorite–a ribeye steak, brussel sprouts, and wild rice with lentils.

The wild rice and lentils were a childhood favorite side dish. I’m confident I could polish off as much of it as my father could make, but I’m equally certain that he just poured the wild rice mix out of a box. Sadly, I can’t seem to find any wild rice that comes with lentils, so I thought I’d just throw in a handful. Soaked for about 15 minutes while the wild rice simmered, then tossed in to blend nicely.

I don’t know why more people don’t like brussel sprouts–they’re like tiny little cabbages. Tossed in balsamic vinegar, oil, and salt, then baked for 30 minutes at 350 degrees. Toss on a little extra balsamic at the end. Nom.

And then the ribeye. It’s a pretty straightforward steak, marbled plenty to give it lots of flavor, even though it’s cooked off the bone. I mix up equal parts kosher salt and ground black pepper, then generously cover both sides of the steak. I melted a tablespoon of butter in a hot skillet, let the steaks sear on both sides for about two or three minutes, then ran them out to a pre-heated grill for two to three minutes per side.

One of the most critical things, in my opinion, is to let the steaks sit for a few minutes (covered with foil) before serving. I know, I know… it’s so tough when that delicious steak is sitting there, your mouth watering in anticipation. Trust me. Wait it out just about five minutes. Then have at it. You won’t be sorry.


Posted in Steak | Leave a comment

Chicken & Couscous

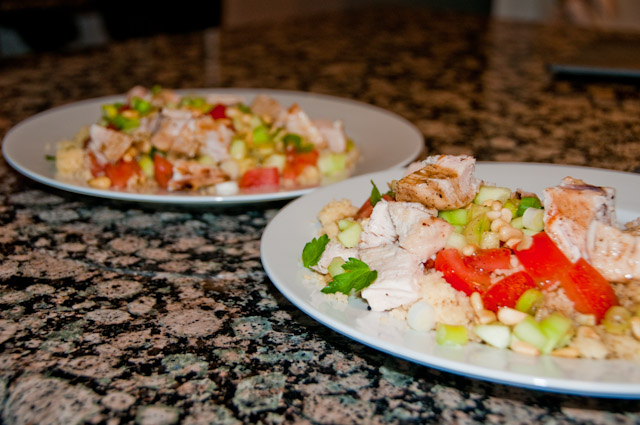
One of my favorite dishes is built on a base of chicken broth-soaked couscous.  By itself, it’s got more flavor than water-soaked grains (and so worth doing for its own sake), but I’ve also found that what really makes it is a separate sauce.

I tried to find a light dish that I could prep and eat quickly and wouldn’t sit like a rock in my belly during my late evening softball game.  I found this recipe and toyed with it a little bit.

What’s most interesting is that the couscous and the chicken (nominally, the two main ingredients) are the least noteworthy in the dish.  Instead, it’s nearly everything else that steals the show, from the “dressing” to the delicate touches of cucumber, tomato, and pine nuts.

Ingredients:

  • 2 chicken breasts
  • juice from 1 lime
  • sea salt & black pepper
  • 1 can of chicken broth
  • 1 cup of couscous
  • handful of pine nuts
  • 1 small tomato
  • 1/4 cup green onion
  • 1/2 cucumber
  • Italian parsley
  • 1/4 cup rice vinegar
  • 1-2 TBSP olive oil
  • 1 TBSP cumin
  • 1 clove minced garlic

Directions:

  1. Squeeze the juice from the lime into a bowl.  I had one handy, but I’m sure that bottled lime juice would work just fine.  Add a 1/2 teaspoon each of salt and pepper.
  2. Dunk the chicken breasts in the mixture and then grill/broil.
  3. Meanwhile, heat the chicken broth.  Once at a boil, stir in the couscous.  Remove from heat and cover.  Fluff after 5 minutes or so.
  4. Chop the tomato and green onion, mince the garlic.
  5. Peel and de-seed the cucumber.  I cut the cuke into quarters, lengthwise, then cut off the middle, seeded segment.
  6. Toss the pine nuts into a pan and heat, careful not to burn them.
  7. In a separate pot, heat the rice vinegar, oil, garlic, cumin, and a little salt and pepper.
  8. Once the chicken is done, cut into chunks.
  9. Dish out the couscous, tomato, green onion, pine nuts, and parsley, tossing in the chicken.  Drizzle with the oil/vinegar/cumin mixture.

Yield: 2 healthy dinner plates.

Posted in < 30 Min Meals, Chicken | 1 Comment

Lazy Sunday

I like few things more than a lazy Sunday morning, lounging on the couch with the windows wide open, reading the paper, cup of coffee in hand, scuffling through the Times’ crossword (we’ve managed to solve the thing the last couple weeks!).

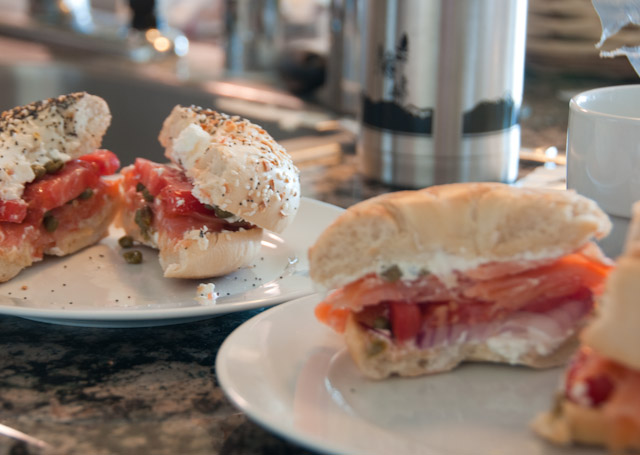
One of those few things would be bagels and lox…so it seems only natural to combine two of my most favorite-ist things together.

Visiting my grandparents in New York City, I looked forward to meals of lox and bagels.  Never one to scrimp on smoked salmon, I was grateful for my grandfather’s willingness to spoil his first grandchild.  Occasionally, I’d accompany him to Zabar’s, where he’d order the salmon from the counter where he worked as a kid in the early 1930s.  Now, I make do with pre-packaged “New York Style” lox and appreciate even more his willingness to splurge on the vast quantities of thin sliced salmon I could consume.

My tastes have changed a little over the years; now I like my bagels & lox with a slice of tomato & onion, capers, and cream cheese.

Posted in Salmon, Seafood | Leave a comment

Beer Friday Appetizer: Deviled Eggs

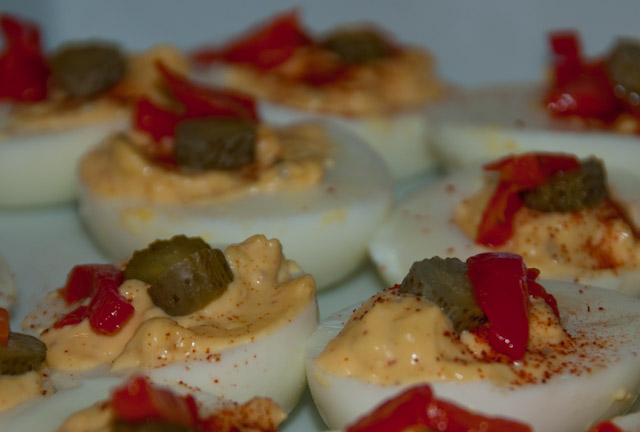
Deviled eggs occupy an interesting spot in the appetizer menu.  On the one hand, they’re full of mayo and goo, a hint of squiggle as the hard-boiled eggs wobble around.  On the other hand, they’re f***ing delicious.

I asked my friend, The Orphan, for her recipe and then played with it some, after looking around on the internets.  Here’s what I came up with.

Ingredients

  • 2 dozen hard-boiled eggs (invariably, I muck up peeling them and they don’t come out right, so I probably delivered closer to 18 eggs)
  • ¼ – ½ cup mayo (The Orphan uses Miracle Whip, but I’m a traditionalist)
  • 2 TBSP deli mustard (I wanted a little kick and the deli mustard is much better than regular yellow…though on further inspection of the fridge, there was some chipotle mustard that I wished I’d used.  Next time…)
  • 1/4 cup sweet pickle relish
  • 2 tsp cayenne pepper
  • 2 tsp paprika
  • 4 sliced gherkin pickles
  • 3 TBSP pimentos

Directions:

  1. Cut the hard-boiled eggs in half lengthwise, gently scoop out the yolks
  2. Mash the yolks with a fork, mix in mayo until creamy.
  3. Add in the pickle relish and mustard, then add a touch more mustard if you want a little more zest.
  4. Spice with the cayenne to taste.
  5. Gently, but generously spoon in the filling to the egg whites.
  6. Dust with paprika, add a slice of pickle and pimento to garnish.
Posted in Appetizers, Beer Friday | Leave a comment

Grilled Salmon Salad

One word: NOM.

Among the things I like about this project is that it’s getting me to try new things in my cooking.  I can make about 10 items blindfolded.  Making anything “new” is usually just a matter of mixing those 10 patented things together.  Steak & potatoes or grilled chicken and asparagus turns into…steak and asparagus–it’s a whole new meal!  Only it’s not.

In the past, I’ve just slapped a little butter on a salmon fillet, maybe sprinkled it with a little lemon juice and/or Lawry’s lemon-pepper, broiled it, waited for it to flake and done.  It was fine.  Easy.

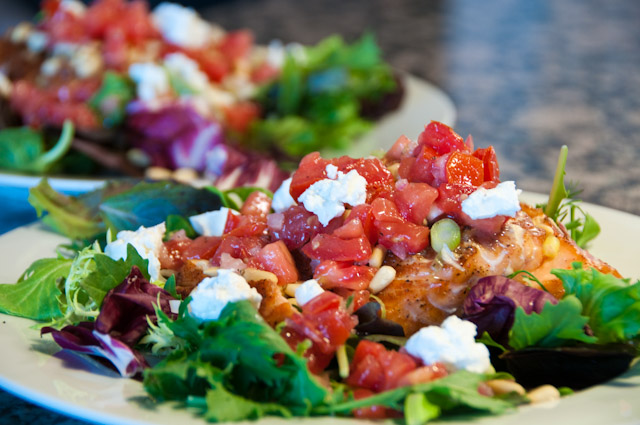
Last night’s meal was different.  Totally new and pretty delightful.  Light, zesty, vibrant.  The creaminess of the goat cheese and the crunch of the pine nuts really sets this apart from other salads I’ve ever had, while the sweetness of the salmon rub complemented the zing of the vinaigrette.

Make this salad.  Do it.  You can thank me later.

The original recipe is here.

Ingredients:

  • 1.5 lb salmon fillet, skinned, cut into 4 pieces
  • 3 TBSP light brown sugar
  • 1 TBSP ground cumin
  • 1 TSP chili powder
  • A little salt and pepper
  • Salad mix
  • Tomato vinaigrette (see below)
  • 4 oz goat cheese, crumbled
  • 1/4 cup minced green onions (white & pale green parts only)
  • 1/4 cup pine nuts

Directions:

  1. Rinse salmon; pat dry.
  2. Mix brown sugar, cumin, chili powder, a little salt & pepper (about 1 tsp).
  3. Put salmon in bowl and rub pieces all over with spice mix. Cover and chill 0.5-4 hours.
  4. Grill salmon, 5 minutes a side over high heat.  When done, it should flake away with a fork.
  5. Divide salad onto plates.  Place salmon on greens.  Drizzle with vinaigrette and sprinkle with goat cheese, onions, and pine nuts.

Yield: 4 servings

Tomato vinaigrette (original recipe here)

Ingredients:

  • 1 cup diced ripe tomatoes (that’s about 1 big tomato)
  • 1/4 cup red wine vinegar
  • 2 TBSP olive oil
  • 1 TBSP minced shallot
  • 1/2 TSP dry mustard
  • 1/2 teaspoon salt
  • 1/4 black pepper

Directions:

  1. Combine all the ingredients in a bowl; mix well.
Posted in Dinner Party Worthy, Rubs & Marinades, Salad, Salad Dressings, Salmon, Seafood | Tagged , , | 1 Comment

Beer Friday Appetizer: Hummus

Um…sorry.  I totally forgot to take a picture of the hummus after I made it and then it disappeared 45 minutes after I showed up at Beer Friday.  My bad.  I’ll make it again, I promise.

I love hummus, though I often feel a little guilty eating an entire container by myself.

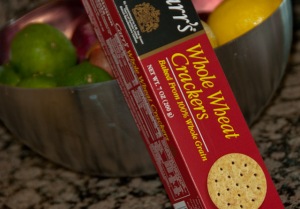
And I’m sure there are plenty of calories in a box of crackers, right?  At least I got a picture of the crackers.

I was a little concerned that I’d screw up my first attempt at hummus.  My fears were compounded as I didn’t have a food processor, but would make do with just a blender.

Ingredients:

  • 15 oz can of garbanzo beans
  • 2 cloves of garlic
  • 2 TBSP tahini paste (Why does something like this come in a gigantic jar? There’s no way I can manage to use all of this…)
  • ~4 TBSP lemon juice (I probably used more than this as I taste-tested.)
  • 1 tsp salt
  • 1 tsp black pepper
  • 4 TBSP olive oil
  • 3 TBSP sugar
  • 1/4 cup sun-dried tomatoes

Directions:

  1. Drain the garbanzo beans, careful to keep the liquid.
  2. Dump the beans and garlic cloves into a blender.  (I suspect that a food processor will work better, but you make do with what you got.)
  3. Chop it up.  This wasn’t a smooth process at all.  The blades spin around, quickly annihilating any beans in the way, but most of the beans end up unchopped off to the side.  With a spatula, I worked the beans down towards the blades.  Nonetheless, the blades weren’t really chopping things up as I’d dreamed.
  4. I threw in some lemon juice, tahini and it still wasn’t hummus-like.
  5. But…then I threw in half of the liquid from the garbanzo bean can…and presto!  The liquid gave the blades something to mix and it almost magically turned into something that looked like hummus.
  6. Add olive oil, salt, and blend.
  7. At this point, the hummus was a bit bitter, so I threw in a little sugar to cut the bitter and added some more lemon juice to add tartness.
  8. I tossed in a small handful of sun-dried tomatoes and blended it up, giving it a nice rosy color and a subtle hint of an extra something.

Yield: about 3 cups

Truthfully, I wasn’t sure how it would be received, but I was happy to see it disappeared quickly.

Posted in < 30 Min Meals, Appetizers, Beer Friday | Tagged , | Leave a comment

Memorial Day Weekend BBQ

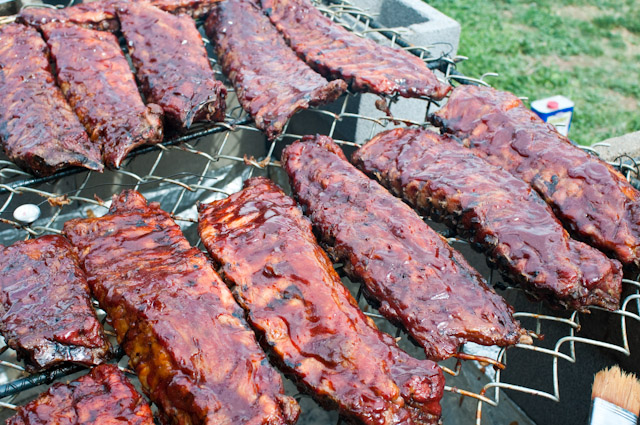
Good ribs are amazing.  Saucy, fall-off-the bone meat, messy goodness.  Nom.

My friends graciously hosted a weekend barbeque where I cooked up a batch of ribs.  I’ve been working on them for a long time and I’m happy to share some of my secrets.

I’ve found that the single biggest factor to the “fall-off-the-bone” factor is removing the thin, slippery membrane off the back of the ribs.  In the past, I’ve simply used a knife and patiently worked the membrane off.  That’s a lot of work and, given the slipperyness of the membrane, a little dangerous.  Or you could follow the tips in this video and use a paper towel to get a better grip.  Better yet, you could have your butcher do it…
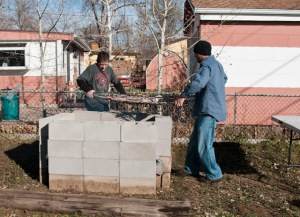
It’s not easy to keep the temperature even on a charcoal grill, but it’s still worth a try.  For this barbeque, we built a 2×3 cinder block pit, 4 blocks tall.  That gave us plenty of height to manage the height and we could add coals as required to keep the fire at 200°, give or take 20º.  Here’s a picture of the pit we built when we did a pig roast a few months ago.

For the grate, I used an aluminum chain link fence, reinforced with a little rebar.  It was tough to track down non-galvanized fencing, but you should never cook on galvanized metal–the zinc will poison you. DO NOT USE GALVANIZED STEEL!

After setting up the grill and getting the coals going, the ribs went on the grate, bone side down for an hour, sometimes loosely covered with aluminum foil, sometimes not.  I found that covering with the foil could wildly change the temperature of the grill, by 50º or more.  I also felt that by starting bone side down, I could protect the meatiest parts from any early grilling missteps.  After an hour, I flipped the ribs over, meat side down to cook for another hour.  At this point, I’ve not added any sauce.

Two hours in, I wrapped each rack tightly in aluminum foil and place bone-side down.  The idea here is to steam the ribs a bit, loosening the grip between the meat and the bones.  I let this go for a couple hours, frequently checking the temperature of the grill.

The ribs have been cooking at about 200º for about four hours when I removed the aluminum foil and began basting the ribs with sauce.  In the past, I’ve been happy to use some store-bought sauce, but for this effort, I figured I’d try my hand at whipping up a batch:

Ingredients

  • 6 cups ketchup (it’s got enough vinegar in it, so you don’t need more)
  • 10 TBSP molasses (about 1/2 a bottle)
  • 2½ – 3 cups brown sugar
  • 1 cup whiskey (I had a bottle of George Dickel’s Tennessee handy)
  • 1 TBSP sea salt
  • 2 TBSP worchester sauce
  • 1 TSP garlic powder
  • 1 TBSP pepper

Directions

  1. On low heat, slowly heat the ketchup.
  2. Slowly add some molasses, some sugar, some whiskey, while stirring to make sure the sugar doesn’t clump.
  3. Continue adding more of the molasses, sugar, whiskey, and the remaining ingredients while stirring.
  4. Constant taste testing, and manipulating the ingredients (mostly the sugar content) until I found the right sweet/saltiness.  I didn’t worry that the alcohol wouldn’t evaporate right away; I figured it would once on the grill.
  5. Let it sit, on a low heat, for an hour.
  6. Let it rest, off the heat for a couple hours, then refrigerate for a night or two before using.

Yield: about 7 racks worth, plus leftover sauce for dipping.  I made 15 racks, so I tripled this recipe and still have a bunch leftover.

After removing the ribs from the aluminum foil, I cut a few racks into halves, for a few smaller portions and began applying the sauce.  Placing the meat-side down, I started on the bone side with a little sauce and let it set there for 15 minutes before flipping the ribs bone-side down and applying the sauce to the meat, letting it set for 20 minutes before applying another round of sauce.  After an hour, it looks pretty amazing.

I like to cook the ribs, sauce-on, for at least an hour, and we left some of them on for two.  That means total cooking time of 5-6 hours.

One last trick I’ve learned is not to dive right in on the ribs.  Let them rest for at least 10 minutes before serving.  The meat will continue to cook even after they’re off the heat source and it’ll be more pleasant to eat the meat when it’s not scalding your tongue.

I suspect that rib recipes are deeply personal, almost family-guarded secrets.  I tend to think that there’s no perfect way, but to my mind, the ribs I love the most are sweet and tender, to the point where a full rack is almost not enough.  Good thing I made a few extra racks…
Posted in Barbeque, Ribs | Tagged , , , | Leave a comment

Beer Friday Appetizer: Stuffed Mushrooms

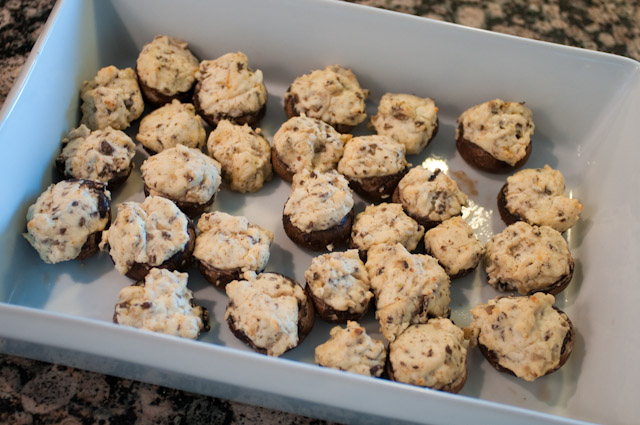
The best stuffed mushrooms I’ve had came from Falling Rock Tap House. They’re not usually the kind of thing I order off a new menu; too easily badly done. Done well, though, they’re delicious. Couldn’t tell you now what prompted me to order them there a couple years ago, but it seemed the right thing at the time.

I’ve never tried to make them before, so here’s my first crack at them. The recipe is based on this one.  Though the recipe doesn’t say so, it’s worth being ready to drain the pan of liquid–soggy mushrooms are no fun.

Happily, they were a hit.

Posted in Appetizers, Beer Friday | 1 Comment

Steak Kabobs

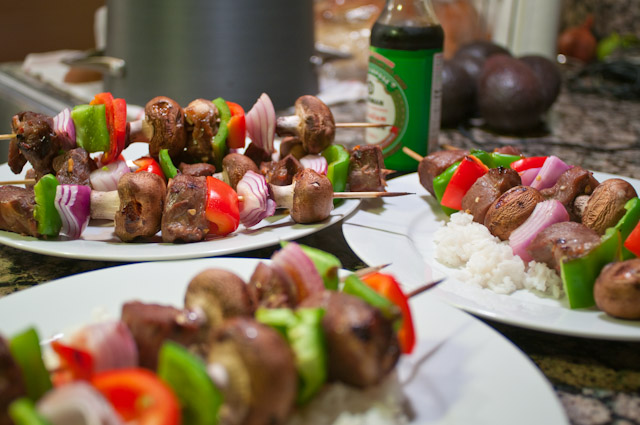
I don’t recall eating kabobs much as a kid, but I’m sure I would have loved the idea of ramming a stick through my food. I’m guessing that my sister and I would have balked at the vegetables–I didn’t like onions, she didn’t like mushrooms. But kabobs seem the perfect way to satisfy each kid’s individual taste–here’s yours without onions, but lots of bell pepper; here’s yours without any mushrooms. Stop complaining. Go eat.

I’ve made this a dozen times or more and it’s pretty easy.  It probably takes a little longer than 30 minutes in total if you make the marinade, but you could definitely cut down the time to close to 30 minutes by buying pre-cut steak chunks and a pre-made marinade. Dinner was on the table 25 minutes after I got home from golf–mostly a function of how long it took the rice to cook.

Marinade Ingredients

  • 4 TBSP Soy Sauce
  • 2 TBSP Honey (I eyeball the soy and honey mix, I don’t think too much of either will hurt the flavor)
  • 2 Garlic cloves, minced
  • Lime juice
  • Crushed red pepper
  • 1″ piece of ginger, minced
  • 1 lb sirloin, cut into big chunks, maybe 2″

Marinade Directions

  1. Throw everything but the steak into a bowl and mix. The honey sticks a little, so a little stirring will get everything blended.
  2. Toss in the steak, coat.
  3. Cover, refrigerate, anywhere from no time to 24 hours (last night’s sat for 30 hours or so).

Kabob Ingredients

  • Green & red bell pepper
  • Red onion
  • Mushrooms
  • Tomatoes
  • Steak
  • Skewers
  • White rice
  • Soy sauce

Kabob Directions

  1. I suppose you’re “supposed” to soak wooden skewers for 30 minutes. I don’t usually–if they burn a little, it’ll be alright.
  2. Get the rice going. It usually takes a little longer than the kabobs, so get that started.
  3. Cut vegetables into 2″ pieces.
  4. Stab vegetables and steak chunks with sharpened wooden sticks. I probably have 8″ worth of food on a stick.
  5. Grill until the steak’s as done as you like.
  6. Serve over rice. Flavor with soy as necessary.

Yields 8 skewers, 3-4 servings.

Posted in Steak | Tagged , , | Leave a comment

Asian-y Chicken

I often don’t think about what to make for dinner until it’s well into the afternoon and then I need to scramble to get it done. Usually, I realize too late that dinnertime is fast approaching and have to hustle to get things ready to eat at a reasonable hour.

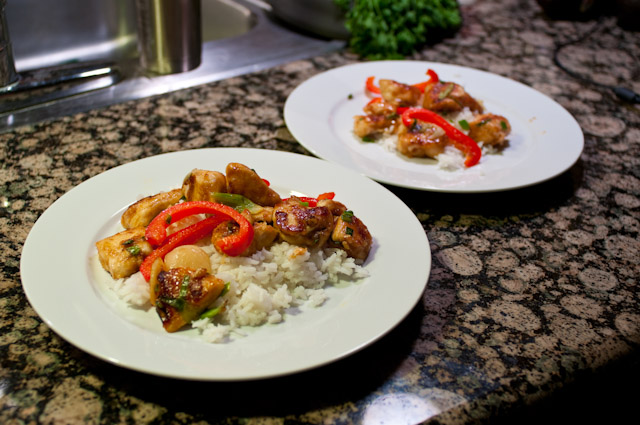
I googled for easy chicken recipe and came across a couple of Chinese stir-fry dishes that caught my attention. This one, in particular, seemed pretty easy. After scanning the pantry for discrepancies between available and needed, I ran down to the UnSafeway for chicken, onion and peppers (and other stuff for marinating steak kabobs for another dinner…details tomorrow). I didn’t have white wine vinegar, but since I usually prefer to modify existing recipes, I didn’t bother getting everything on the recipe.

One of the problems I have is that I waste too much unprepared food, like green onions, half-used peppers, etc., and I’ll just toss them after a few days when they’re limp and useless.  Part of this project is to be better about using the ingredients I have on-hand, even if they’re not explicitly called for in a recipe. I figure it’ll be alright tossed in. And I don’t need 7 different flavored oils, the two (olive and peanut) I have handy should get any job done.

I probably could improve on last night’s dinner by adding in a little crushed red pepper and a little salt.  Not much, but just enough to add some kick.

Prep time: 15 minutes, cooking time 25 minutes.

Ingredients

  • Package of chicken breast tenders
  • 1/4 cup cornstarch
  • Peanut oil
  • 3-4 cloves garlic, minced
  • Chives (leftover from a previous dish)
  • Red bell pepper (I used ½ of one, figuring to use the other half in a different meal)
  • Soy sauce
  • Rice vinegar
  • 3 green onions
  • Water chestnuts (a can happened to be lying in the cupboard)
  • White rice

Directions

  1. Start the rice.  I love having a rice cooker.  It’s easy—throw in a little water, salt, rice, press a button and presto, 20 minutes later, you have perfect rice. I try hard to avoid kitchen gadgetry, but if there’s one that I’ll compromise on, it’s that.  Nothing sucks the life out of a meal like badly done rice.  Since I don’t currently have a rice cooker, so my strategy is to throw in a small pat of butter with the rice on the stovetop, turn the heat up to medium-high and get it to boil before bringing the heat down to low (not the lowest setting, but 2-3 on my stovetop).
  2. I try to cut up the garlic & vegetables first, so that I don’t have to cut anything after I’ve been mucking around with raw chicken, and leave them aside.
  3. Cut the chicken into chunks.
  4. The original recipe called for 3 tablespoons of cornstarch.  I just eyeball it; I’m sure I went over 3 tablespoons.  Won’t matter.  Combine the cornstarch and chicken chunks in a bag, shake to coat.
  5. The original recipe calls for 1 tablespoon of vegetable oil.  I love the way peanut oil tastes and smells while cooking, so I used that.  Again, eyeballing it, probably 3 tablespoons.  Heat the skillet with the oil.  I like it hot, but not sizzling.  Call it medium-high for a couple minutes.
  6. Toss in the minced garlic.  I like to let the garlic go a couple minutes soaking in the hot peanut oil.
  7. Toss in the coated chicken.  Let the chicken brown.  Stir, careful not to let the chicken burn until the chicken is browned and mostly done.
  8. Toss in some soy sauce (probably 4 tablespoons) and some rice vinegar (probably 3 tablespoons), again it won’t really matter because you can always add a little more.  The soy sauce gives the chicken a nice browned color.
  9. Toss in the chives, bell pepper, onions, and water chestnuts.  Stir.
  10. Hopefully the rice is done.  Serve the stir fry over rice.  Nom.
Posted in Asian, Chicken | Tagged , | Leave a comment